Showing posts with label Bike. Show all posts

Refreshment for the Beast

The yearly major servicing for the FZ1S has finally come again

Much of the components on the bike are due for servicing and I also need to prep it for the next coming track session

Most important part to go is the tires. The Dunlop Alpha 11 had proven itself for the past year as an excellent sports tire that provides good performance on the road and track alike. As it has reached its maximum heat cycles I have let go of it even though the wear on the tire is still moderate. This is one thing I cannot afford to be stingy on. As much as i want to get back the same Alpha series, Racewerkz had run out of stock for the Alpha 12. Alternatively Norman tried to convince me the Bridgestone R010 semi-slick tire, but due to its poor performance on wet weather (and I still do travel in wet weather from time to time) I have to give it a pass. Instead, I chose the Dunlop Sportmax Qualifier II. I had used the Qualifier in the past, it provided a balanced performance so picked this up for the bike this time round.


Next, the fork, radiator and brake system are due for change of fluid as well. For the fork I changed the oil to iPone grade 7 fork oil, which gives a harder damping feel to the fork.

The Maxima Cool-aide Coolant has been on the bike since day one so no change this time round since this coolant has been serving well all these years.

For the brakelines, I replace the Motul brake fluid to the iPone DOT4 300 brake fluid which I need more time to assess its performance before I can comment on it.


The Air Induction System has been blocked off as well so from now, no more popping noise from the exhaust whenever I perform quick deceleration. Somehow the tone from the exhaust has changed a bit too, seems to be slighter more bassy.

Thanks to Norman's persistent recommendation, he showed me the GB Racing engine protection covers that will help prevent catastrophic engine damage during accidents. I was just hesitating, thinking that I can wait till my next visit to Racewerkz before I install. Just nice, a biker friend of mine visited the shop directly from PG and he has shown me his crashed (but still ridable) bike and the protection the covers had given to the engine. He would have paid more for engine repair if the covers are not there to help. That prompts me a decision to immediately install the covers on the bike. Since I'm going to install them sooner or later, might as well do it on the spot while the stock is available.

Now the bike is all prepped up for the next track session. Woot

New Addition to FZ1: Radiator Fairing


My pal, Rudy, actually gotten this product from overseas and replicate it locally (yes, what I installed is a replication of the real thing). He wanted to get enough people so that he can replicate it at a good cost. Once he has gotten the replicated products, he passed me one more than a month back (yes you heard it right), asking me to install it on my bike.


Well, due to busy schedule and other commitments, I kept pushing it off until yesterday. Finally found some time to fix this fairing on my bike and see how it looked.

Well, installation is a breeze, all I need to do is to remove the original radiator side panels and the small cover (which I wonder the purpose of it) on the frame, using the custom made riser screw boss on the radiator and everything is completed in less than an hour.

Custom Riser Screw Boss

How It Looked after installation.


Good Lid with a Good Price

It was supposed to be my buddy looking for stuff for his car......

Ended up, as I was strolling through the shop and something caught my eye: New HJC R-Pha 10 helmet.

At first I was pretty hesitant to get it, even though my OGK helmet is pretty old and smelly, but when I heard the price quoted with the kind of stuff that comes with the helmet, I made a very swift decision. Here's why:


3D Logo instead of the normal flat sticker

Scroll Wheel style vent cover switch

BIG centre windshield lock

Does the front design reminds you of Darth Vader mask? The side vents have uncanny AGV Ti-Tech design though

Yes, and it weighs only 1.2kg, that is light for the price I'm paying

Unique air outlet vent

Comfortable interior with a massively big breathguard. Don't think my windshield will get fogged easily

Yeah, it comes with a manual

Oh, it comes with a 5 year warranty as well! Got a nice warranty card somemore!

On top of that, It comes with a 2nd smoked windshield, Shield cleaning kit, Pinlock Antifog sheet and a helmet bag. All for a very good price. Really gives Shoei/Arai helmets a run for their money

Can't wait to wear it out this weekend.


Project "LEDification"

.
It's been sometime since I have done some mod on my trusty Fazer. As Rudy had shown me the new LED signal indicators on his bike last week, and given the price he had revealed to me, I reckoned that this is one practical purchase.

Why, the stock signal indicators are spoilt or what, some might ask. Well, for one, I'm a sucker for LED and LEDs are known to use less power than conventional bulbs. Secondly, the indicator lights I'm getting have integrated brake light functions, which doubles up as a secondary brake light for safety reasons. Plus, the price is very affordable (less than 100 bucks a set of front and rear indicators). Lastly, the indicators are universal mountings which means I can transfer them to my next bike.


While using LED lights are less power consuming, it posed a problem: the indicator relay will switch VERY fast due to minimal electrical loading on it. That will make my bike look like a moving disco. To resolve the issue, I need to include a resistor load into the system so as the slow down the relay switching speed. Thanks to QuizeSilver, I got a rough gauge of resistor rating and head down to Sim Lim Tower (for non local readers, it is a place where one can buy unassembled electrical/electronics components). In the end, I settled with ceramic 25W 6 Ohms resistor with heatsink, heatshrink tube and electrical cables. I could have bought a ready-made resistor load but nothing beats the joy of DIY, plus it's cheaper.


So, what I done is solder the 2 leads on the resistor to nicely cut cables and add on a heat-shrink tube over it for waterproofing purpose. Once done for 4 of them, I brought of the stuff to the carpark to proceed with the installation.

Rudy and Derek popped by to help out in installing the indicators. Luckily they were there else I will be spending much longer time fixing it. Initially I wanted to find a way not to splice the original indicator cable but there seems to be no option for that approach. So, I finally decided to cut the original cables to install the indicators. The rear signal lights took the longest time to fix as I need to ensure I am connecting to the right leads. Nevertheless, we managed to get the wiring up and running and when we did a test run, they worked!


So, once we nailed the rear lights, the front signal indicator installation was a breeze as it is more straightforward (just signal, no brake leads). That only took us like 45 mins to fix both sides and once we fixed everything (panels etc), we did one last trial run and voila! It runs flawlessly!


So now, the bike had been LEDified, sans the headlights, which still have to run on filament bulbs. Awesome.

1-Day Malacca Trip

.

As Quizesilver is itching for a Malaysia bike tour before he starts his lessons, he had organised a one-day trip to Malacca for some speed blasting, good meal and shopping spree. I figured since my Thailand trip I had not been on a road trip for a while so might as well take this chance to bring my Fazer and the Fazer Devil for a spin.

Basically it is only a one-day ride up and down the city of Malacca, 270km from Customs. Since it is only a short ride, there is nothing much to pack except a tank bag containing basic stuffs and my D90 camera. I brought the charger for my N97 as well just in case the juice runs out before the end of the trip.

The group met up at Gelang Petah Petronas petrol kiosk early and I found myself in a station crowded with Singaporean cars and bikes. Apparently many had planned some short road trips similar to us.

The group consists of Mudi on FZ6 with Maran, QuizeSilver & Alan on Hayabusa and yours truly on the FZ1. This is the first time Maran and Mudi joined us for a road trip. These 2 dudes are very nice peeps and bloody humorous thru their constant taunting towards each other hahaha....


The ride up is pretty smooth and traffic is pretty light, enabling us to keep a average speed of 120km on most part of the roads. We stopped by Pagoh R&R for petrol top up before we continue with the journey. The weather is freaking scorching with passing shower on one SMALL area of the journey. We kinda got conned into wearing our rain gear only to realise that...imagine riding in that gear under a 30+ deg weather....

Upon reaching the city, we rode thru the narrow streets to find a good spot to park the bikes and thanks to Maran, we found this Famosa Chicken Riceball restuarant where we can park the bike just outside the place. This is one of the reasons the group came for this trip: the Chicken Riceball. I came to this restuarant years back and now I'm back again.


So once we had our stomach filled and thirst quenched, we walked around the streets where this area is part of the tourism spot. Under the burning weather, with one carrying his bike gears around, it's not a real pleasure walking along these streets, as I find myself super drenched in my own sweat.. yes, I am constantly sweating as we were walking along the streets.

Along the street, we stopped by this seemed-to-be-famous dessert shop (typical Singaporean mentality lah, you see long queue means it's good :p) and some baba Ice Kacang and Chendol. Nice, but a tad too sweet for me. The rest are enjoying them though. Guess that's the reason why I can't say sweet nothings LOL.


After going one round the streets, we proceed on to the nearby shopping centre (about 15 mins walk) where we can get some cool air. We roamed the place for like a hour before we head back to the restaurant to collect our bikes.

The road is slightly more crowded as it is Sunday and most drivers/riders are heading back for Singapore, but nevertheless it was a smooth ride back. Had some dinner at Gelang Petah R&R before heading back home. That pretty much ended the day... a short but enjoyable one :)


More photos can be viewed here

The Black Devil wanna Breath!

.
Yes, yes, my babe.

I know you had been trying very hard to tell me that you have problem breathing when you bring me places. Even with the power of the Power Commander 3 unit, you still gasping for more air. Since today is a sunny morning and I'm not feeling lazy, I decided to perform a little surgery on you to "clear" your nose.

When I removed the "lung" (aka airbox), I find that your intake is pretty small. So what I've done for you is to open up the intake so that more air can get into your filter. Opening up the intake didn't take much effort as the plastic is soft enough for me to use cutter to cut it through. After the operation, more air will go thru it.


Next your nostrils (aka the chassis air vents) is pretty much clogged too, thanks to the cluster of wires going thru it. I unblock them by re-routing the wires thru another way so as to unblock the vents. After the re-routing, the vents are now less clogged with wires and you should be able to breath better.


Now the only thing left to do is to take you out for a ride to see if the surgery works. Since many of your kind had been operated that way with good results, you should be fine :)

Almost Dead Bike Revived

The battery on my FZ1 had been very weak recently. Whenever I charged the battery up to the optimal voltage, it didn't hold its charge for too long, usually not more than 2 nights without riding. On Saturday, the battery finally gave up on me, reaching a weak voltage reading of 12.3V. I will need a minimum of 12.4V charge in the battery to barely get the engine started.

I should have gotten a new battery earlier since I already knew of the symptoms but due to work and other personal commitments, I could not get my arse down to the bike shop to get it replaced. So on that fateful day, just when I was about to go to Junion's house for lunch gathering, the bike refused to start. Best of all, it was a public holiday so all the bike shops were closed. What a timing.

So I left the bike resting at my void deck carpark for couple of days and be a public commuter for 2 days to work. Reason that I did not get the battery earlier is due to some financial cockups from my company. However, the rider's itch sets in and I figured that it's about time to get the bike running again.

So with the help of Junion, we went down to LAB (Lim Ah Boy) to get the Yuasa battery. While it is claimed by the shop that it is not the OEM battery, it's from the same manufacturer anyway and it is half the price of the original component. So without hesitation, I got the battery, bring it back home and unbox the battery

The battery package comes with a plastic dispenser containing sulphuric acid, which is meant to be poured into the electrolytes in the battery to sort of "activate" it for use. The sulphuric acid is very corrosive so there's many warning signs on the dispenser and instructions manual.


Leaving the battery there for 30 minutes to let the battery sets in, I brought it down to the carpark and started removing the seats to expose the battery compartment. There you see a flurry of wires which leads to my voltmeter, ERP unit, horn relay, alarm and Power Commander 3 unit. It did not take much effort to remove the battery and replace it with the new one. In less than 20 minutes, with the help of my brother, I got everything up and when I switch on the ignition, the roar of the detuned R1 engine is heard once more! Woohoo!


The original OEM battery

Revived with 12.6V at standby charge

New "Lacing" Gloves :p

Ever since the return from Thailand Trip, I've been left without a pair of long gloves for touring and tracking purpose.

So since I am at LAB with Angkuguay and Dabitch, I was thinking might as well take the chance to check out the price and get the replacement gloves if the price is right. Went into the shop, and Darren, the shop's salesman, recommended the Alpinestar SP2 gloves which looked good for dual purposes and the price is affordable. So within 10 mins, I've become the gloves' master.

Hope it can last me for another 9 years haha

Sneaky Fellows!

Bobby asked me to go Racewerkz yesterday as he is installing the Power Commander 3 for his Fazer plus dyno run for tuning.

When I reached the workshop (after waiting for 3 hours for the weather to improve), Sam, one of the shop's mechanic, asked me for my bike key. I was like, "why you are asking me for my key when I'm only here to accompany my friends?"

When Quizesilver and Bobby insisted me to hand over the key, I began to realise that they are planning something for my bike. To my surprise, they had actually gotten me a K&N air filter as my birthday present. So Sam got it fixed up and I kept the old one in case when I wanna wash the new filter in future.

It was a pleasant surprise for me. And I later found out that it is shared by Quizesilver, Bobby, Alan, Dabitch, Bryant, AngKuGuay, Damien and Sarah. Thanks guys/gals for the timely present (my stock filter is due for replacement anyway haha). Really appreciated :)

The Road Trip of Xgrind and AngKuGuay: Epilogue

Finally.

A trip that was talked about 8 years ago in 2000 had been planned, executed and completed. This trip is a personal achievement for the both of us and we are glad that it had been fulfilled.

Now let's see the summary of this awesome trip:

Post-trip maintenance
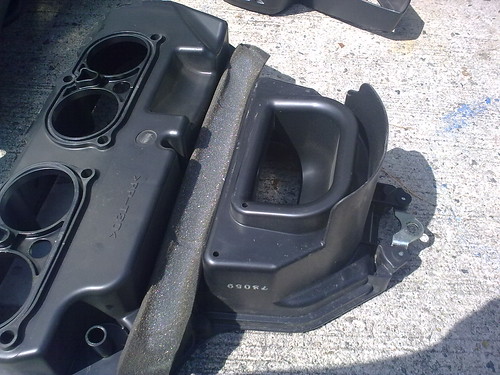
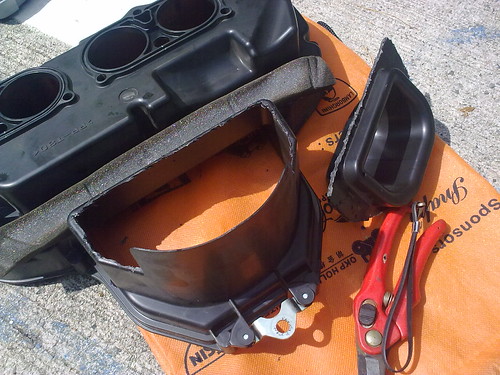
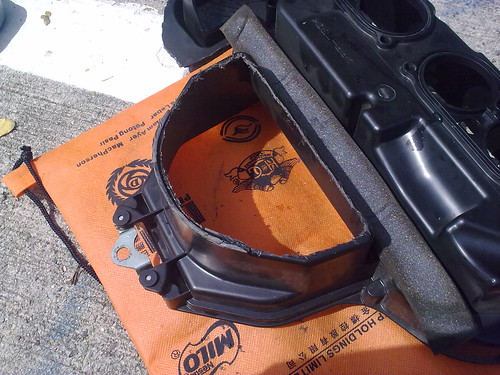
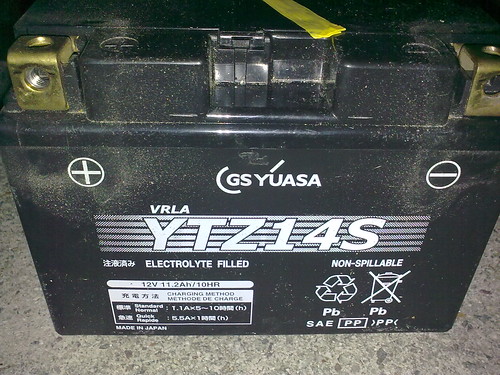
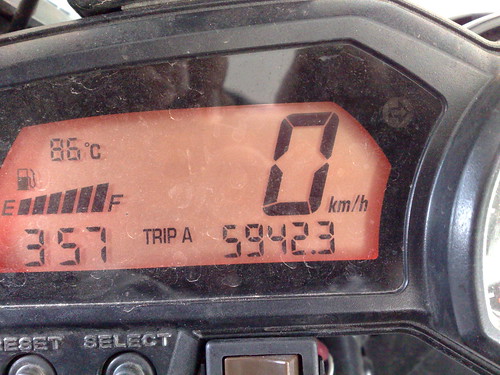
As with all long distance trips, the main workhorse had to be serviced after a gruelling endless run on the road. For my Yamaha 2008 FZ1, the following components had been serviced:
- Tire: Changed to Pilot Power 2CT instead of the intended Dunlop Qualifier due to lack of fresh stock for the Dunlops
- Coolant: Flushed and recharged with a new bottle of Maxima Cool-aide coolant
- Engine Oil: Threw out the old black shit and poured in a new dose of Maxima Extra Fully Synthetic Oil

Equipment Used
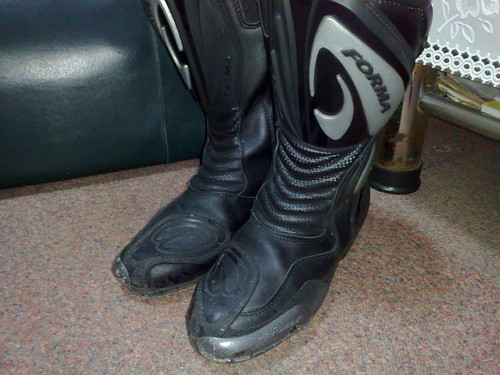
- Forma Riding Boots: A budget riding boots with sliders. Kept my foot from flying debris and rocks. However, not water-resistant enough to stop water from flooding the internals during our ride up to Hai Yat on the first day.
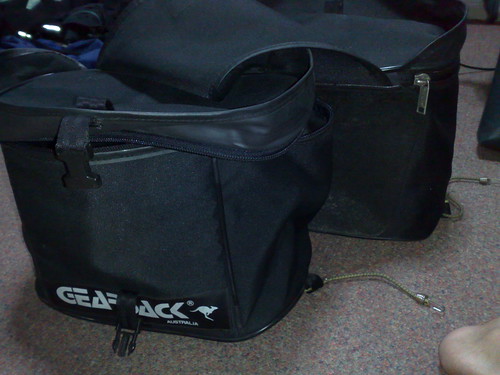
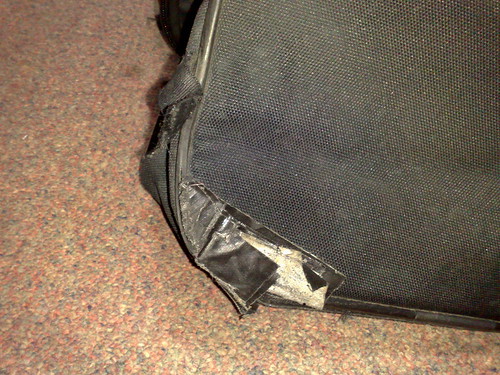
- Gearsack Soft Panniers: This panniers had been with me for more than 8 years and still performing well in terms of waterproofing. Kept the stuffs in there dry and cosy. However, this pannier don't pair very well with my FZ1 as the unconventional grab rail design on the bike could not allow the panniers to secure properly. And the bottom of the panniers had been worned off by the rear tire due to abrasions during bumpy rides.


- Oxford Sports Humpback Tank Bag: AKG and I bought this for this trip as both our old tankbags are no longer waterproof. Have no problem stuffing my EeePC, electronics equipments, water bladder, maps together in this bag as its space size can be expanded. Due to the strong magnets, the tank bag secured very well on the tank and I don't see it wobbling during high speed rides. Good piece of gear


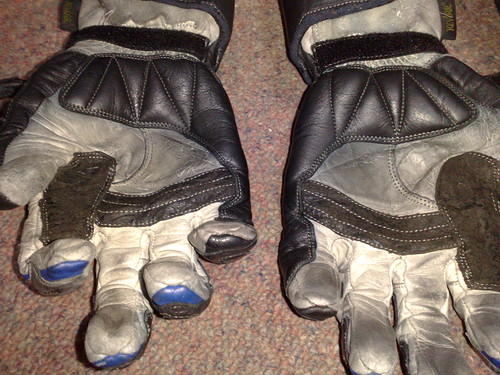
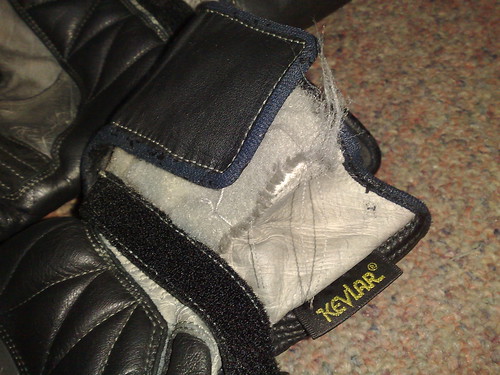
- Komine Touring Gloves: My almost decade-old gloves. Leather became hard as hell and caused a big blister on my palm. During the trip the velcro patch had torn off and I had to use the sewing kit from the hotel to temporarily secure it for the rest of the trip. Guess its time is due. TRASHED.


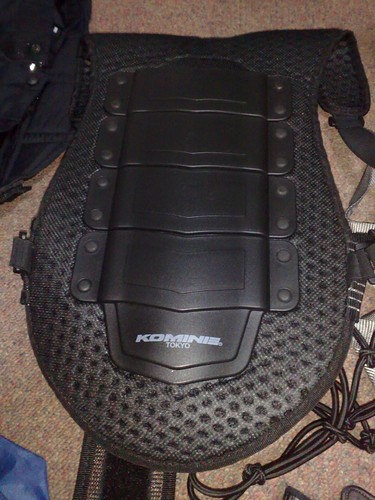
- Komine Back Protector: An essential gear for long trips. This gear had helped me prevent any potential backaches that may arise from the long hours of riding.


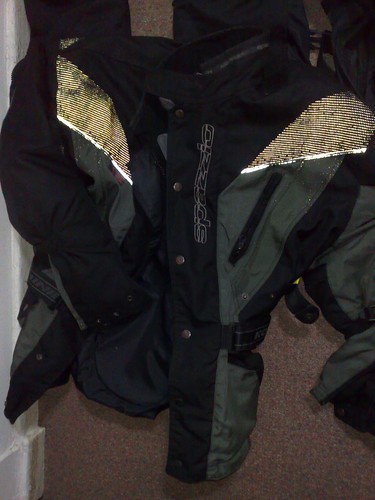
- Komine Spazzio Touring Jacket: After almost a decade of use, the jacket still performed surprisingly well and the waterproofing is still there. No complaints about it :)

- Held Touring Pants: Got this about 7-8 years back. Provided good protection on my knees but the waterproofing properties are totally screwed. Inner liner had also torn beyond repair. TRASHED.

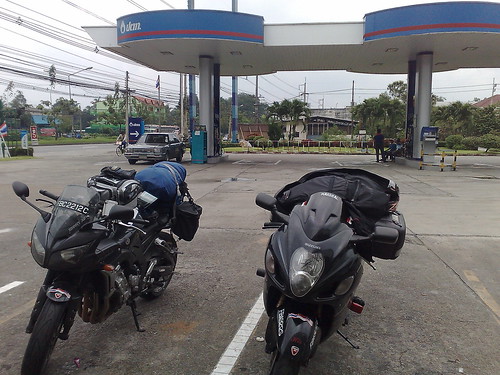
- Power Commander 3: Thanks to the good tuning skills of Norman from Racewerkz, the bike's fuel efficiency had improved quite significantly and not to mention that overall throttle response had been smoother. The bike managed a maximum FC of 18.12km/L (highway runs) which not possible otherwise. It is also thanks to PC3 that the bike managed to survive thru Highway 105 (way southwards from Mae Hon Son) for more than 230km without a refuel.

- Nokia Maps 2: Running on my N95 8GB, this appplication enabled us to find nearby hotels and helped us pinpoint on our current location to reference with the map. However, at certain times it didn't point us to right route or direct us a longer route instead of a more straightforward one.

- Nokia Sports Tracker: I had been using this application since day one of the trip to keep track of the routes we have actually taken. After uploading to the website, we are able to see the overall routes taken throughout the trip. Alas, the phone crashed during the route from Krabi to Hat Yai and that part of the route is only partially tracked. A great piece of software nevertheless.

- Brembo Master Cylinder 19x20 + Venhill Brakelines: This combo is a life-saver. We ran into situations where we needed hard braking and it gives me total control on the braking pressure and stopped in time without mishaps. Definitely a good investment.

- Maxima Chain Wax: As I don't use Scotoiler for this bike, I relied on this product to lubricate the chain every 500km to maintain the chain performance. After 6000km, the chain was not even stretched a single bit.

- Lonely Planet's Thai Phrase Book: Oh yeah, had to borrow from AKG for the communication in Thailand. While I had learnt a couple of Thai words from there, I still have difficulties applying them on normal conversations LOL.

My Thoughts on This Trip

Well, this trip served a couple of purposes for me:
1) To go for the longest trip ever attempted by me
2) To see and experience the culture of another country
3) To use this chance to straighten out some personal thoughts
4) To experience an ironbutt rider's life

I would say that all the purposes had been served thru this trip. I had learnt a great deal about people, culture, biking, and many other things. I generally felt welcomed by the Thais' friendliness, their smiles, their generosity, their food and their lifestyle.

Will I go back again? You bet I will. It is definitely a good getaway from the hectic lifestyle in Singapore. That being said.... realised that tomorrow will be my first day of work in 3 weeks haha.

Videos
Now, for the videos I didn't managed to upload during the trip. Enjoy.


Loading up the Busa

Lighting up the Fire Balloon in Chiang Mai

Lighting up the fireworks

The fireworks and Fire balloons in the night sky of Chiang Mai

At the Mae Sai Boundary Post (North Thailand/Myanmar border)

Riding without helmets.....

The Road Trip of Xgrind and AngKuGuay: Day 16-17

Finally.

Today will be our last morning in Thailand and we are heading back to Singapore in 2 days' time, staying a night in Kuala Lumpur. It had been a fulfilling and eye opening trip so far and been kinda reluctant to go back to the urban jungle of Singapore. What to do, reality....

We pumped our last tank of Gasohol 95 at the last PTT petrol kiosk at the outskirts of Hat Yai as well as having our breakfast there. We enjoyed our last cold towels available at the Thailand 7-11 outlets while AKG enjoyed his last Espresso DIY coffee (kinda his fav coffee from Thai 7-11). AKG had a short chat with a local who happened to be a military officer before we move on to the border.


Once we reached the border post, we returned our vehicle declaration forms (a MUST when you leave Thailand by your own vehicle), got our passports stamped and rode over to the Malaysian Customs. From there, we saw familiar wordings (melayu/english) on the signboards and we proceed down to the North-South highway for Kuala Lumpur. Just a short distance from the Customs, we encountered a roadblock, a first since the beginning of our trip. I could more or less guess that these people will be stopping us for speeding or something similiar and slap us with a fine. But when we told them that we came from North Thailand, the guys seems impressed and let us off. Guess they figured that we are tired and broke, lucky us LOL.

The road down is just.... road down. Nothing spectacular about the scenery along the road except the mountain highway at Ipoh. However, weather is not really that good as we get on-off rain several times before we rest at the first R&R in Malaysia. Despite the lousy weather, our riding pace is fantastic and we cleared half the journey in shorter time than we anticipated.

As we closed in to KL, we stopped by the Toll Plaza and told AKG that I will use the GPS on my N95 to guide us to the hotel we usually stay, Hotal Nova. This time, Nokia Maps failed me. It directed me to a wrong turn on the highway, causing us to split into wrong entrances, as AKG realised that signboard on the other entrance showed the correct direction. I had to make a U-turn, ride into the right entrance, waited for AKG in case he U-turn back to look for me. Waited for a considerable amount of time until I received a call from him that he had reached the hotel. With a sigh of relief, I slowly rode towards the city centre and found the hotel. Learnt a new malay word which will guide me to my regular hotel in future: Pusat Bandaraya, which means City Center.

Once we checked into the hotel, we went to Times Square to check out the stores (nothing much actually, much like the shopping centres in Singapore) then proceed to have our dinner.

The next day, we check out at noon, knowing that we can cover the remaining distance to home in less than 4 hours. As we moved out, we intended to have our lunch at Ayer Keroh. As I have not eaten/drank anything while AKG had not eaten, we rode like we are rushing for time LOL. When we reached Ayer Keroh R&R, we realised that the place is closed and we have no choice but to go to another R&R for our lunch. The next available R&R with food will be at Pagoh. Again, I was riding as fast as we can and AKG commented that we covered 180km in less than 90 mins LOL.


Stopover at Pagoh R&R

Once we are done with the lunch, we move on straight to Gelang Petah R&R for our last refuel before heading home.

Total distance travelled:


That concludes the Road Trip of Xgrind and AngKuGuay. Thanks to those who had sent us off and sent us well wishes.